

How to Add Bales in the WoolClip App
This guide explains how to add bale records in the WoolClip app, including how to prepare the job, sync active jobs, enter bale details, allocate mobs, and resolve common portioning issues
How to add Bales in the WoolClip App
Before You Start
- Create the job in the web with service before using the App. Include team members and mob information if known.
- Open the WoolClip app while the device has mobile service or internet access
- Log in and sync active jobs from the web service
- Confirm the current job appears in the job list
- After the job has synced, either stay online or switch to shed mode for offline use
- Confirm who will be responsible for adding bale details, such as the Presser, Wool Grower, Wool Handler, or Wool Classer
- Make sure each bale is marked and recorded in the physical wool book as soon as possible to reduce marking and recording errors
- Check that wool book bale details match the physical bale details
- If bales are stacked before recording, make sure the bale label or bale details remain accessible
Note: Anyone with the WoolClip app on a device can enter bale records, but access to the relevant job depends on the web job and team setup.
When to Record Bales
Bales can be scanned and recorded at different points in the shed workflow. Choose the option that best suits the team and reduces the chance of missed or mismatched bale records.
- As each bale is pressed
- At the end of each run
- At the end of the day
- As bales are loaded onto the truck
- At the end of shearing
Add a Bale to the Wool Book
Step 1: Make sure the app has synced to the web job while the device has mobile service or internet access
Step 2: If required, switch to shed mode for offline use
Step 3: Open the job from the job list
Step 4: Select the Wool Book icon. The icon is green when the wool book is open.
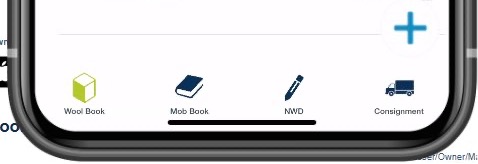
Step 5: Select the blue plus icon to add a new bale
Step 6: If ePack is selected, the scanning function will open. If ePack is not selected, the app will skip scanning and open the bale details screen.
Step 7: Complete the bale details, check, then select Scan Next or Save
Complete the Bale Details
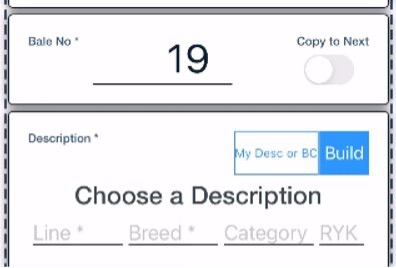
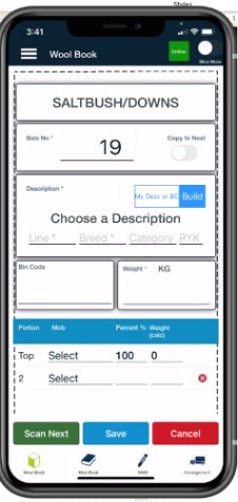
- Bale number: Auto-generates in sequence but can be edited to an unused number if required
- Copy to next: Switch this on when entering multiple bales with the same details, such as several main line bales
- Description: Line, Breed, Category, and RYK are the four bale description fields. Tap the line to open the Code of Practice bale description menu
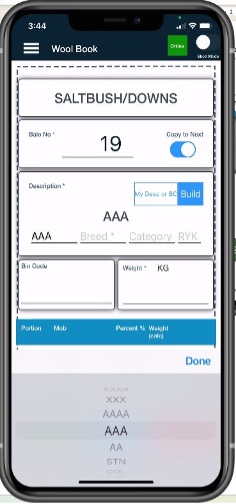
Add line AAA
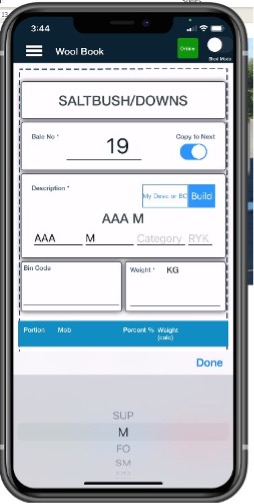
Add Breed M – Done
- My Desc or BC: Use this to access custom bale descriptions or create a Bulk Class bale
- Bin Code: Enter a bin code if used or select a custom bin code set up in the web menu
- Weight: Type in the bale weight
Allocate a Mob
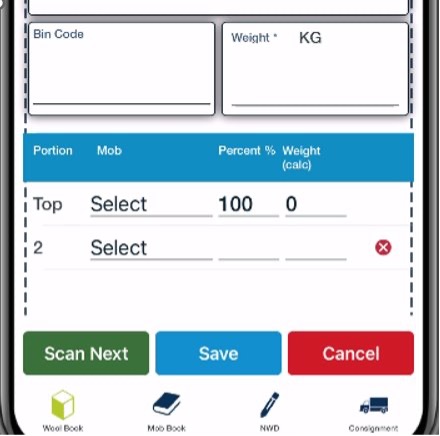
Use the mob allocation fields to record the mob and the portion percentage for the bale. Mobs can be added to the app using the Mob Book icon if they were not already included when the job was created in the web.
- One Mob: Use the top Select option to open the mob menu, then choose the mob. If all wool in the bale is from one mob, leave the percentage at 100%.
- More Than One Mob: If the bale includes wool from more than one mob, select 2 to add another mob and enter the percentage contribution for each mob. The total must equal 100%. When a second mob is selected, a third mob option will appear. Leave if not required.
Finish the Bale Record
- Scan Next: Opens the camera so you can scan the next bale
- Save: Saves the bale details and closes the wool book
- Cancel: Removes the details entered for the current bale
Portion Missing Error Warning
This warning can appear when a second mob line has been selected accidentally and no entry has been recorded, or when the mob portions do not total 100%. To fix it, remove any unused mob line or adjust the mob percentages so the total equals 100%.
Next steps
When you are comfortable with this workflow, explore related guides, watch WoolClip how-to videos, or contact AWEX WoolClip support if you need help.
Still need help?
Get in touch with our support team and we'll walk you through it.