

Adding a Wool Book Entry in the Web
This guide will take you through the steps to complete a wool book entry in the web page
How to Add a Bale Entry to the Wool Book in WoolClip
The Job contains the Wool Book and list of bale for a wool harvest or selling season. It is recommended to keep a physical wool book copy.
Step 1: Select the Wool Book tab from the Job workflow
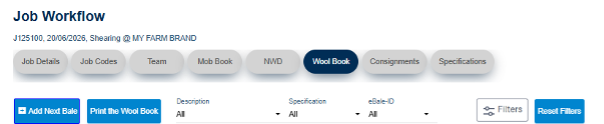
Step 2: Select Add Next Bale to open the bale entry screen
Step 3: The starting bale number will be the bale number entered in the Job module. WoolClip will automatically use the next available bale number and will not allow a duplicate bale number within the same Job.
Step 4: If the bale number needs to be changed, delete the generated number and enter a new unused number. The system will continue from the next available number after the entry is saved.
Step 5: Enter the Bale Description
- Build the description from the four description menus as relevant Line – Breed – Category – RYK
- The Breed: This field is mandatory
- Add the Line, Category and RYK fields where they apply
- Eg (Line) AAA (Breed) M for AAA M, or (Breed) M (Category) PCS for M PCS
- The line builder uses Code of Practice descriptions
- If using a custom description, make sure it has already been created in Job Codes or the User burger menu
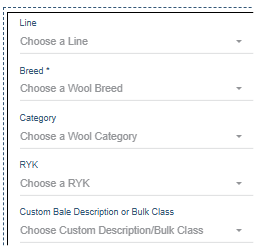
Avoid creating a custom description that already exists as a Code of Practice description. Tip: Keep bale descriptions consistent. Spaces and spelling differences create separate descriptions, so avoid duplicates such as AAA M and AAAM.
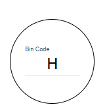
Step 6: Add a Bin Code, if Used
- Leave the Bin Code blank if bin codes are not used for this bale
- Type the Bin Code directly into the Bin Code field or start typing to select an existing saved Bin Code from the drop-down list
- Saved Bin Codes can be set up in the user burger menu or the Job Codes
- If a Bin Code has a saved line comment, that comment will automatically flow through to the comments section of the specification
Step 7: Enter the Bale Weight
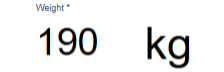
- Enter the actual bale weight if scales are available
- If scales are not available, enter an estimated weight
- Bale weight is used for clip records such as total wool weight and cut per head calculations
Step 8: Allocate the Bale to a Mob
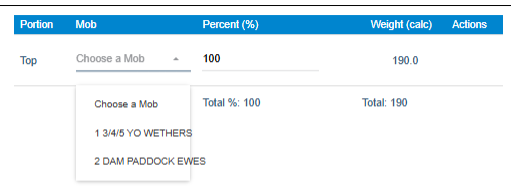
- Select Choose a mob to open the list of available mobs from the Mob Book
- For most bales, select one mob and leave the percentage at 100%
- If a bale is split across more than one mob, add each mob and enter the estimated portion percentage for each one
- Make sure the mob portions add up correctly before saving
- Use the delete action if a mob has been added by mistake
- Accurate mob percentages improve cut per head reporting
Step 9: Complete the Remaining Bale Details
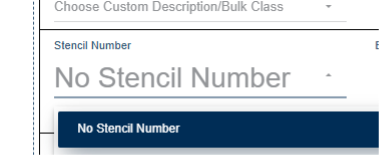
- Select the Wool Classer stencil number where required. If there is only one Wool Classer in the Team then this will be the default stencil
- Available stencil numbers will show from team members with the Wool Classer role
- A D Cert record can be created by selecting No Stencil
- Select Save to record the bale in the Wool Book
- Repeat the process for the next bale by selecting Add Next Bale
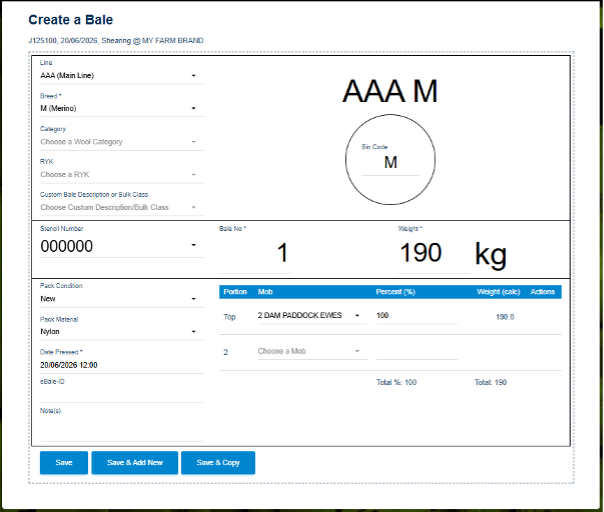
Tip to save time! If adding another bale with the same details, use the Save and Copy tab to copy all the last bale details to the next new bale. The next bale number will be generated, and a weight entry is required.
Next steps
When you are comfortable with this workflow, explore related guides, watch WoolClip how-to videos, or contact AWEX WoolClip support if you need help.
Still need help?
Get in touch with our support team and we'll walk you through it.