

An Overview of WoolClip: A Guide for Wool Classers
Everything a Wool Classer needs to know about WoolClip
What is WoolClip?
WoolClip is the online Wool Classer specification and Wool Grower NWD. Create digital clip documentation and send directly to the Wool Marketing Organisation. Pipeline benefits including traceability, recording eBID, reduced errors, collaboration, and logistics.
At a glance
- Create digital wool clip specifications and National Wool Declaration (NWD)
- Send specifications directly to the wool Marketing Organisation
- Improves traceability (including recording eBID)
- Reduces paperwork and helps avoid errors
- Works across web and mobile app, with syncing when back online
How to access WoolClip
Step 1: Access to the Web and App is from the User’s account, Username and Password. Details added to the App will Sync to the web when in service.
WoolClip is a website. Access via internet from a computer, tablet, or smartphone. To start Go to www.woolclip.com.au. In the web use the WoolClip workflow modules to start a Job, add clip details and finalise and send the specification.
The WoolClip app can be downloaded from the App store or Google play. The App is used in the Wool Shed to keep a wool book and scan the eBale, used with or without service.
Use the Web for
|
Use the App in the shed for
|
Step 2: Login or create account
The primary users of WoolClip are Wool Classers and/or Wool Growers (owner/managers).
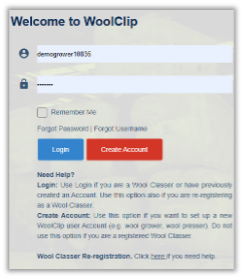
Wool Classers log in with their username/password pre-assigned by AWEX. If you are a registered Wool Classer (and a Wool Grower) use the Login tab from the Home Page. Use this instruction to get started with WoolClip as a Wool Classer.
All Other Users create an account. Set up a User profile, Email and Mob Phone and create a Username and Password. Use this instruction to get started with WoolClip if you are a Wool Grower or other.
First time access only: Verify your contact details. Click on Send Code against email and smartphone (if using). Enter each Code, accept the terms of use and click on Verify.
Step 3: Dashboard and Navigation
Read the Getting Started panels. On the last panel select ‘I am a not a Wool Grower’(or registered Wool Classers who are Wool Growers, select I am a Wool Grower and set up a farm account).
Step 4: Getting ready in three easy steps. From the website:
- Start the Job
- Add the Owner/Manager and other Team members as known
- Add mob/s or request mob details from Owner/Manager in the Team
Start the Job
Think of the Job as a new Wool Book for a wool growing season. The Job is started prior to or at beginning of shearing and information managed, added or updated at any time. The Job can be created by the Wool Grower or the Wool Classer or in collaboration. The same Job can be used for subsequent shearing’s during the season. Add additional Mobs and update the NWD.
Select Create New Job
- Add the Wool-ID if the Wool Grower has a Wool Clip Farm account to populate the Brand, PIC and farm location
 The Wool-ID can then be used as linking code between a Farm Account and Jobs/Specifications and access to the same Job for the Wool Grower and Wool Classer
- To activate this function the Wool-ID must be approved by the Wool Grower from the web or SMS notice
- Fill in the mandatory* fields. If an entry is not known add a temporary value and complete later
- Select a Quality Scheme(s) if applicable
- Save
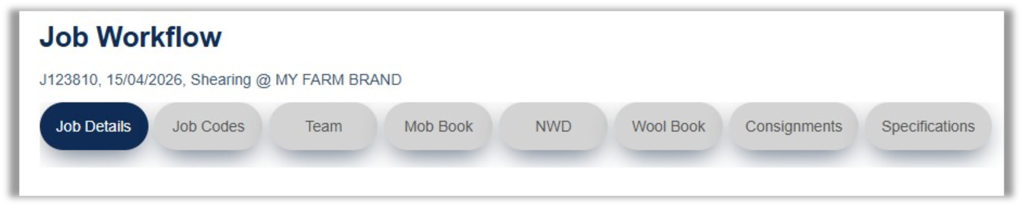
Once the Job is saved the workflow modules are used for navigating the job
Job Codes (Optional)
 Use of the Job Codes module is optional to create custom bale descriptions and bin codes. If not used, simply add bin codes and build the bale descriptions in the wool book module.
Add Team Members
- The Wool Grower with a Farm account will be populated in the Team with the role of Job Administrator and Owner/Manager (O/M) when the Wool-ID is used and approved
- The Wool Classer who starts a Job will be in the Team as Job Administrator and Wool Classer
- Add the Marketing Rep – adding a Marketing Rep in the team allows the Rep to view the Job from their login/device. They will receive a copy of the specification on finalisation.
- Other Team members can be added and invited to create an account and/or view the Job or relevant Job modules based on the role selected
Add the Mob/s to the Mob Book
Mob book details form the basis of the NWD section of the Specification. Mobs can be added weeks before shearing starts, or progressively during shearing. A Mob entry must be created before a bale containing wool from that mob can be entered in the wool book.
Select Add New Mob
- Number of sheep in mob can be updated when actual number is known
- Take care to enter the correct Mulesing Status and contact with shedding breeds response
- Complete the Mandatory* fields
- Update mob information at any time eg. VM type, length etc.
- Save
- The order of the Mobs in the Mob book need not be the order of shearing.
- Note: Mobs can be added in the web or on the app
Send the NWD declaration to the O/M
The NWD declaration must be completed by the O/M before the specification is finalised.
For Wool Growers with a farm account, it is recommended to declare the NWD before shearing starts, saving time and potential missed declarations for bales heading to sale. To send a declaration request to the Owner/Manager in the Team:
- Select the NWD module
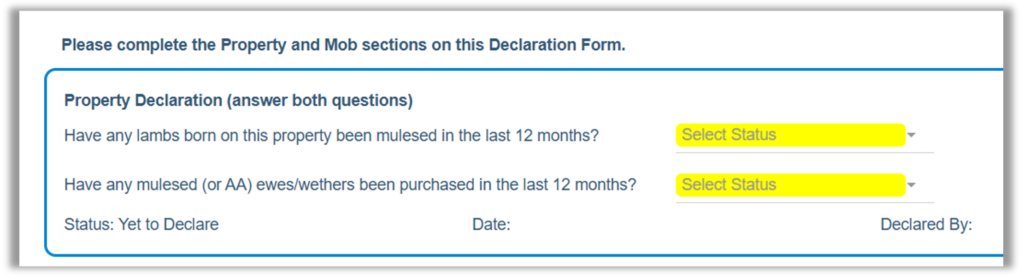
- Select a response to the two property declaration questions
- Send a request to the Wool Grower to declare the NWD

- An email and/or SMS is sent to the O/M details from the Team Module
- Ask the O/M to Check the details of each mob and edit as required. The O/M agrees to the NWD program, enters their name and declares.
- If mobs are added after the declaration has been made any newly added mobs will need to be declared
- All mobs must be declared before the specification containing bales from the mobs is finalised
- Declared mobs on the specification are identified by a Green Tick

Using the App during shearing
Open the WoolClip app in service and log in. Sync the Job created in the web to the app. Select the Job. The app will open at the Wool Book.
Add bales to the Wool Book
Bales can be added at any time that suits the workflow: At time of pressing, at the end of the run, at the end of the day, as bales are loaded on the truck, etc. Bales can also be entered in the web. It is recommended to keep a manual wool book as a record at time of pressing.
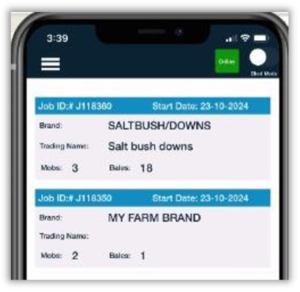
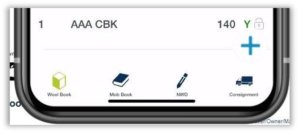
Easy steps to adding bales to the wool book:
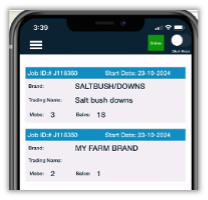
- Open the Job in Service and switch to shed mode
- To Scan and add a Bale to the wool book select the Blue Plus button in the bottom right corner of the Wool Book screen
- When the eBale function is enabled the camera on the device will open in the app
- Hold the screen over the QR code and the eBale number will record and progress to the bale details screen
- The next bale number will be generated. This can be overwritten if scanning out of sequence
- Build the bale description as it is recorded on the Bale
- Add the Bin Code (if used) and record the weight
- Record the mob/s from the menu showing mobs in the Mob Book
- Save
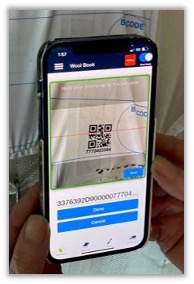
Note: Top right corner of the app screen shows the shed mode function where the app is working offline (red). Switch online (green) to Sync bales to the web.
Bales collected in the App will sync to the web site when the app is in service and online.
Sending a Consignment
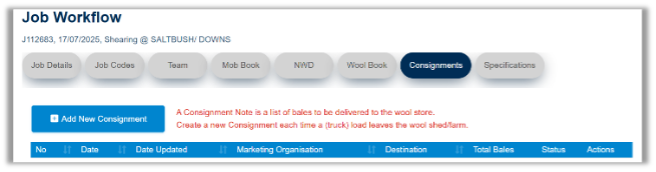
The Consignment Note is used to notify the Marketing Orgnisation destination warehouse of the delivery of bales. Sending a consignment is not mandatory but has advantages for logistic management.
- Select Add new consignment
- Check off bales that are being consigned
- Select the marketing organisation and destination
- Complete details and send
Ready to send the Specification
- The WoolClip specification replaces handwritten paperwork
- The specification module collates information from each module in the Job
- A specification can be built by any team member with Job Administrator role, usually the Wool Classer or the Wool Grower with a Farm account
- Specification lines are built from bales saved in the wool book

- Select Add New Specification and complete the mandatory fields
- Select Add Line to use the line builder function to select individual bales that contribute to each classed line
- Choose the bale description and select the required bales. The filters can be used to reduce the number of bales in the list to show only matching bales.
- Autogenerate can be used to create a specification in seconds, using logic by matching description, bin code, and mobs.
Add line comments
- Select Print draft to check all details. Lot size and line order can be edited before sending
- Finalise and automatically send the specification to the selected Marketing Organisation
Next steps
When you are comfortable with this workflow, explore related guides, watch WoolClip how-to videos, or contact AWEX WoolClip support if you need help.
Still need help?
Get in touch with our support team and we'll walk you through it.